Jupyter Notebook 是Python的可交互式现代化运行面板,能够在远程执行代码块、保留Python环境等,且对于OpenCV、Matplotlib等图形库在输出时不会因窗口堵塞,而是直接输出到VSCode的Jupyter Notebook视图中,且兼容tqdm等进度条库,对于模型训练等需求非常便捷。
1 – Jupyter 安装 & 配置
python -m pip install jupyter notebook
使用 jupyter notebook 命令启动一次Jupyter服务器。
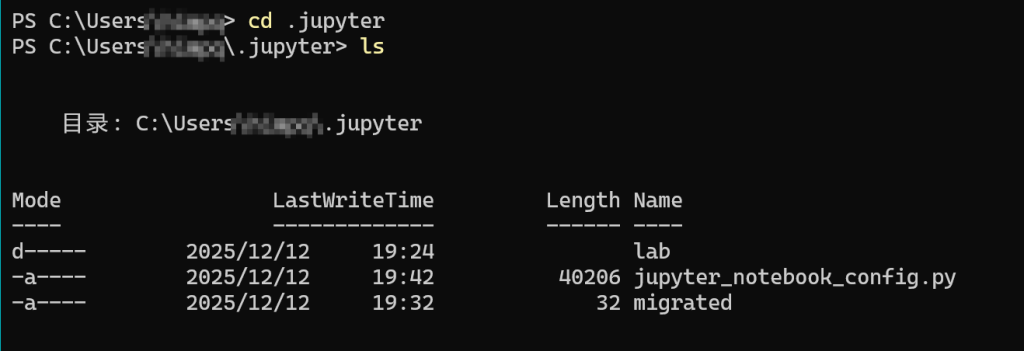
随后在C:/Users/[你的用户名]/.jupyter下找到jupyter_notebook_config.py:
编辑jupyter_notebook_config.py,加入以下内容:
c.ServerApp.ip = "0.0.0.0"
c.ServerApp.port = 8888 # 设置服务器的端口
c.ServerApp.open_browser = False

c.ServerApp.token = "设置一个密码"
c.ServerApp.allow_remote_access = True
c.ServerApp.allow_root = True
随后再次启动 python -m jupyter notebook ,使用浏览器在主机上访问 localhost:[你设置的Jupyter端口],输入设置的服务器token,出现这个页面:

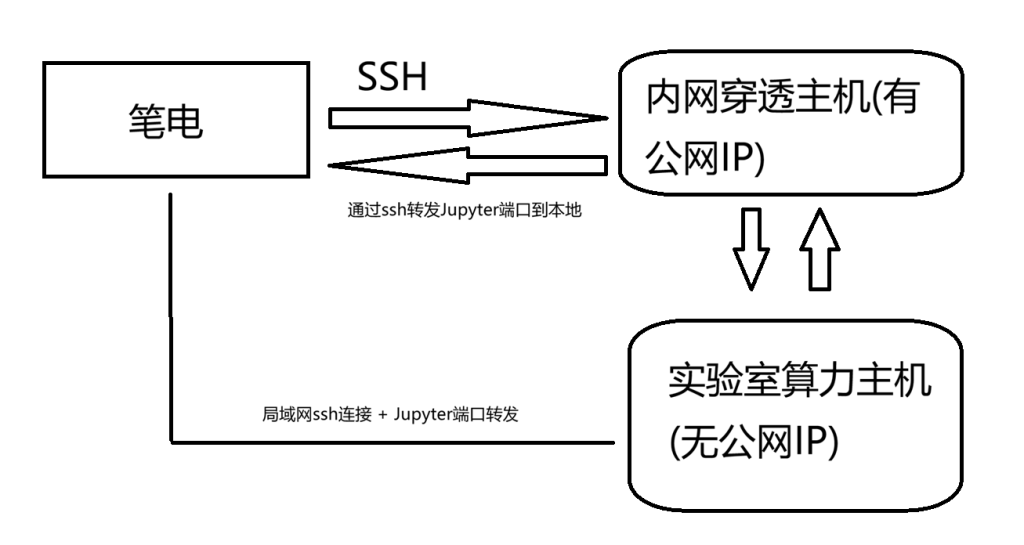
2 – FRP内网穿透搭建
可以白嫖Azure的云服务器,或者你自己有Linux内网穿透。
在远程的Linux有公网ip的服务器执行如下命令:
wget https://github.com/fatedier/frp/releases/download/v0.52.3/frp_0.52.3_linux_amd64.tar.gz
tar -zxvf frp_0.52.3_linux_amd64.tar.gz
cd frp_0.52.3_linux_amd64
vim frps.toml
修改文件内容:
# 你要绑定的端口
bindPort = 7000
启动frpc服务:
nohup ./frps -c frps.toml &
随后在Windows主机上也部署frp:
配置frpc.toml(Windows):
serverAddr = "你的公网IP"
serverPort = 内网穿透服务器的绑定端口

[[proxies]]
name = "ssh"
type = "tcp"
localIP = "127.0.0.1"
localPort = 转发本地的端口(ssh为22)
remotePort = 要绑定到内网穿透服务器的端口
启动并测试:
./frpc -c frpc.toml
#在你的笔电上执行:
ssh user@公网IP -p 绑定远程服务器的端口
3 – NSSM 计划任务
使用NSSM:NSSM – the Non-Sucking Service Manager 准备内网frp穿透和Jupyter服务开机自启的计划。
将NSSM拷贝到C:/Windows/System32下,然后打开cmd执行:
nssm install frpc
nssm install jupyter
上面两个命令行每执行一个就会弹出一个GUI窗口让你确认执行的命令行和执行的目录,这时候可以分别写python -m jupyter notebook和frpc -c frpc.toml。
使用如下CLI开启服务:
nssm start frpc
nssm start jupyter
4 – VSCode 的 Jupyter Notebook连接
首先进行端口转发:
ssh -L [要转发到的本地端口]:127.0.0.1:[目标机器Jupyter绑定的端口] -p [目标服务器的端口] [用户名]@[目标服务器IP]
执行成功后会正常进入目标服务器的ssh界面,此时打开localhost:[转发的本地端口]查看Jupyter是否正常。
随后在VSCode中配置远程执行:
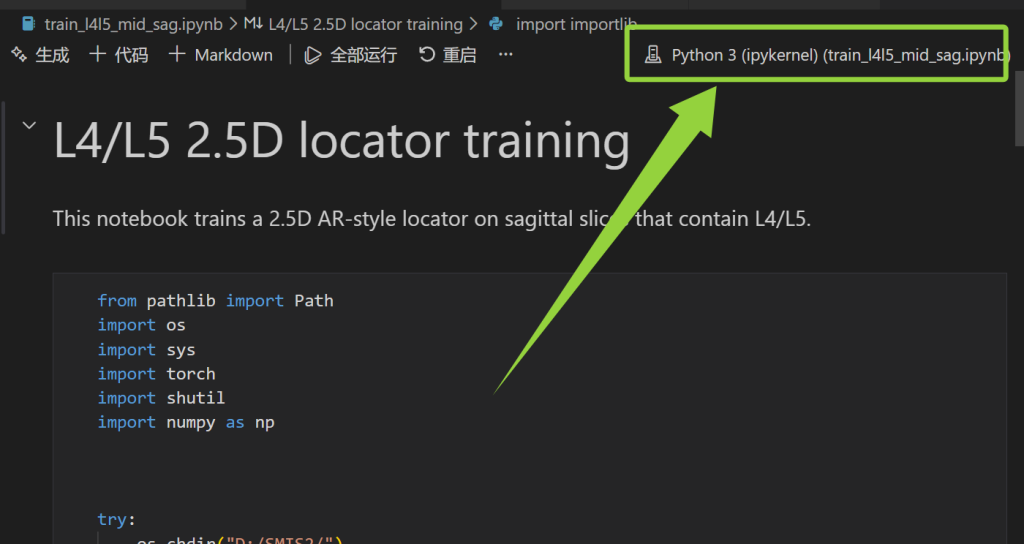
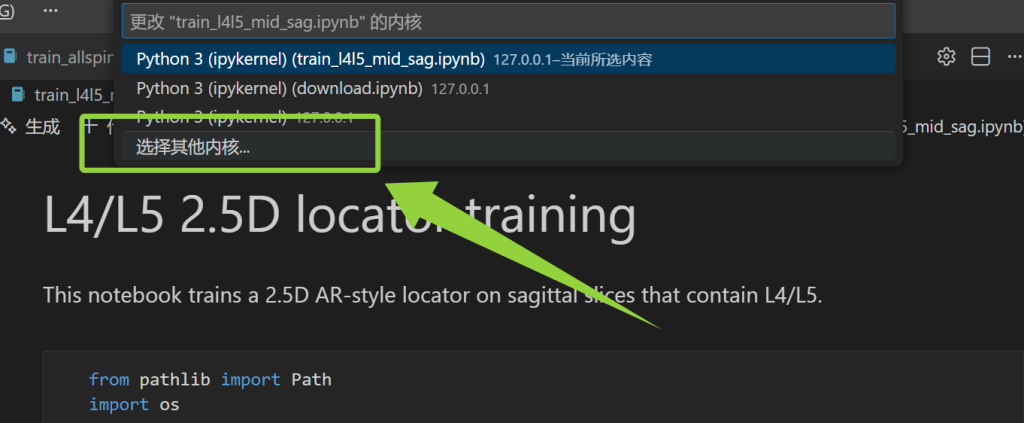

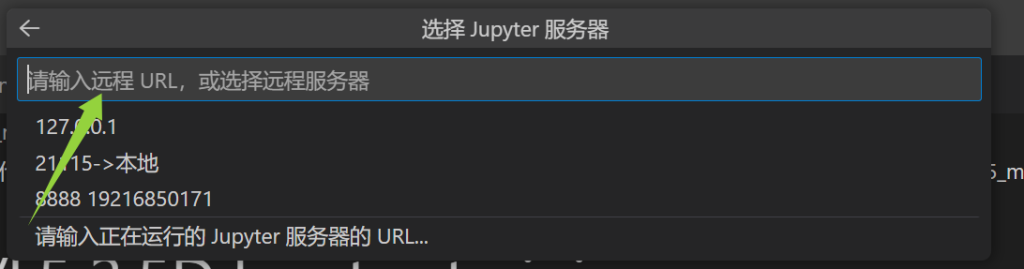
输入localhost:[转发到的本地端口]然后输入密码选kernel即可。